Nothing looks less ready for business than sending proposals from a free address. A custom inbox like name@yourdomain.com feels like a real front door. If I already own the domain, setting up google workspace email is usually a one-evening job.
I follow the same basic path each time: pick a plan, prove I own the domain, point mail to Google, then test everything. In 2026, Google’s admin screens can shift a bit, so a button name or menu path may change, but the setup logic stays the same.
What I gather before I start
Before I touch anything, I make sure I have three things: my domain login, a card for billing, and access to the current email account tied to the business. If the domain lives at GoDaddy, Namecheap, Squarespace, Cloudflare, or a web host, I’ll also need the DNS area. That section is often called DNS, Zone Editor, Advanced DNS, or Name Servers.
I also check whether the domain already uses email somewhere else. That matters because once I replace mail records, new mail starts going to Google instead. If I need old messages later, I back them up first.
As of March 2026, Google Workspace business plans start at $8.40 per user monthly on Business Starter, or $7 per user with annual billing. Business Standard is $16.80 monthly or $14 annually, Business Plus is $26.40 monthly or $22 annually, and Enterprise uses custom pricing. Google also offers a 14-day trial. For Google’s official overview, I keep Google’s custom email page open in another tab.
DNS sounds technical, but I think of it as my domain’s address book. It tells the internet where my website lives and where my email should go.
Step by step: set up Google Workspace email
When I want a clean setup, I move in order and don’t skip ahead.
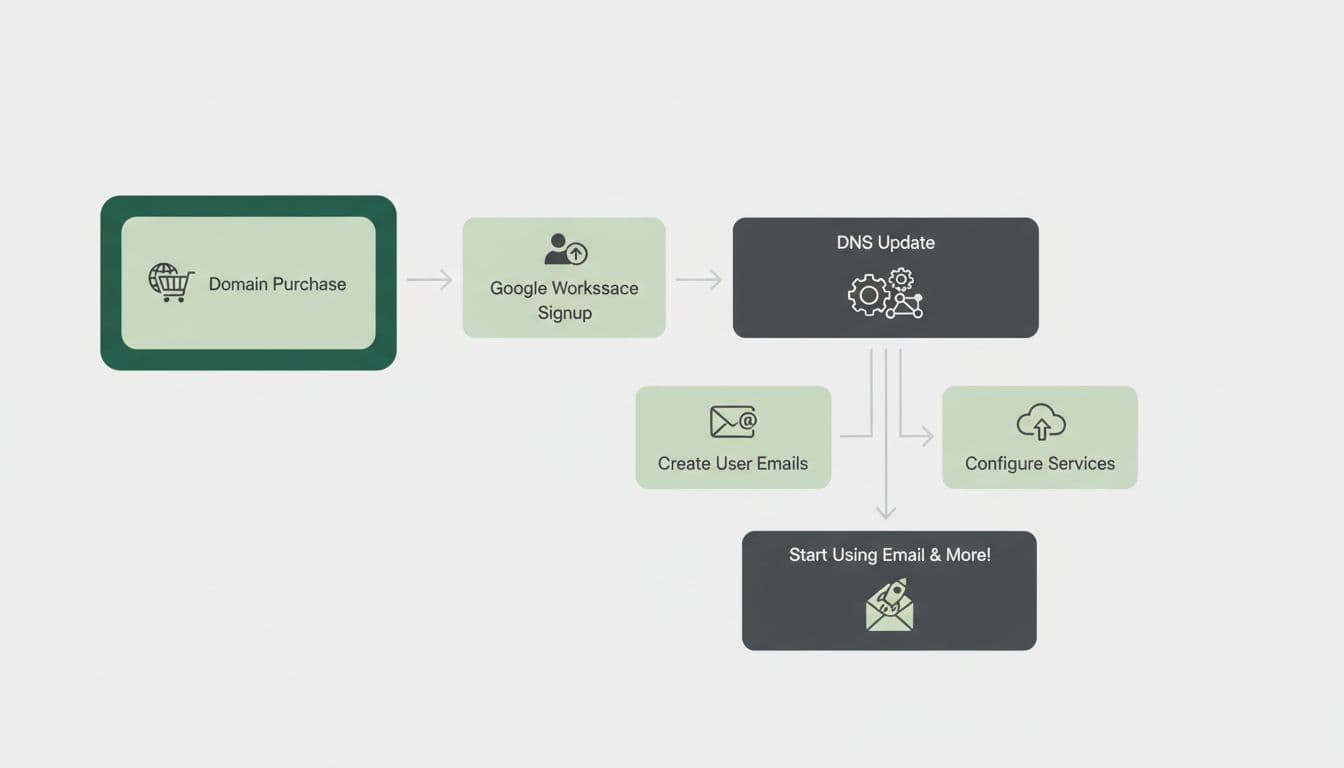
- Start the sign-up flow
I enter my business name, team size, contact details, and the name I want on the first mailbox. This might be me@yourdomain.com or hello@yourdomain.com. Google then asks if I want to buy a domain or use one I already own. I pick the existing domain option. - Add the domain I already own
Next, I type in my domain, such as yourdomain.com. Google uses that to build my future email address. At this point, it hasn’t taken control of the domain. It just needs proof that I own it. - Verify domain ownership
Google usually gives me a TXT record. That’s a short text entry I paste into my DNS settings. Then I go to my registrar or host, find the DNS page, add the record, save it, and return to Google to click verify. If the screen looks a little different from what I see, I compare it with this custom domain guide. - Change the MX records
This is the part that actually sends mail to Google. MX records are like street signs for email. I delete the old mail records from the previous provider, then add Google’s MX records exactly as shown, with the same priorities. One wrong number can send mail into the weeds.
Tip: If my domain uses custom nameservers, I edit DNS at the active DNS host, not always where I bought the domain.
- Create users and test mail
After Google accepts the records, I create mailboxes for the people who need one, such as sales@yourdomain.com or support@yourdomain.com. Then I send a message from a personal account to the new address and reply back. If both messages arrive, the core setup is working.
DNS changes often show up in minutes, but they can take longer. If verification or mail routing doesn’t work right away, I give it a little time before I panic.
After the setup, I finish the small details
Once mail starts flowing, I clean up the account. I add aliases if I want one inbox to receive several addresses. For example, hello@yourdomain.com can forward into name@yourdomain.com. That keeps things tidy and still looks polished from the outside.
I also turn on 2-Step Verification right away. Email is a front door to invoices, client threads, and password resets, so I don’t leave it with just one lock. Then, if I’m moving from another provider, I import old mail so my history doesn’t vanish.
For better delivery, I later add SPF, DKIM, and sometimes DMARC. Those records help other mail servers trust messages from my domain. They aren’t always required to start, but they help a lot once the basics work. If I want more screenshots because Google moved a menu, this step-by-step walkthrough is handy.
Common problems I fix first
Google can’t verify my domain
When verification fails, I usually check the simplest issue first: did I paste the TXT record into the right DNS zone? If the domain uses a web host’s nameservers, adding the record at the registrar won’t help. I also look for a bad host name, missing quotes, or a record pasted into the wrong field.
Sometimes it’s only a timing issue. DNS has a delay, often called propagation. In plain terms, the internet needs time to notice the new record.
Old MX records are still fighting Google
This happens a lot. If the previous email service still has MX records in place, some mail may go to the old provider while other messages head to Google. I remove non-Google MX entries unless I have a very specific reason to keep them. A mixed set of records causes messy, hard-to-trace delivery problems.
Email sends, but nothing arrives
If my new inbox won’t receive mail, I check three things fast. First, I confirm that Google shows the domain as active in the Admin console. Next, I review the MX records one more time for spelling and priority errors. Finally, I test from an outside address, not from the same domain, because internal routing can hide problems.
If hours pass and nothing changes, I recheck DNS at the true host, then compare my setup against the official instructions and my saved records. Most broken setups come down to one typo, one old record, or one DNS panel edited in the wrong place.
A custom inbox turns a plain domain into a business identity people trust. Once I’ve finished the DNS work, google workspace email feels as familiar as Gmail, just dressed in my own brand. If you already own the domain, start with one mailbox, test it well, and build from there.