How I Validate a Professional Email List Using Hunter.io (Without Wrecking Deliverability)
A professional email list can look spotless in a spreadsheet and still wreck a campaign. One bad send raises your bounce rate, lowers your reply rate, and damages your domain reputation for weeks. Hunter.io email verification gives you a ch...

A professional email list can look spotless in a spreadsheet and still wreck a campaign. One bad send raises your bounce rate, lowers your reply rate, and damages your domain reputation for weeks. Hunter.io email verification gives you a check before you send.
This guide walks through a repeatable workflow. You prepare a CSV file, run the bulk verifier, read each status, and split the results into three groups: send-safe, review, and suppress. You also learn how to budget credits, schedule re-checks, and measure whether verification worked.
What Hunter.io email verification checks
Hunter runs a chain of tests on every address. According to the official Hunter Email Verifier page, the checks cover format validation, gibberish detection, disposable domain lookup, webmail identification, MX record verification, SMTP server presence, SMTP address verification, and accept-all detection.
Each test removes a different kind of risk. Format validation catches typos. MX checks confirm the domain can receive mail. The SMTP step asks the mail server whether the specific mailbox exists. The accept-all step flags domains with a catch-all policy, where the server says yes to every address.
No verifier gives a guarantee. Some servers block probing. Some accept everything during the check and bounce later. Treat each result as a risk rating, not a promise. Hunter says the same in its email verification guide: verification does not fix deliverability alone, and reputation and warm-up practices still matter.
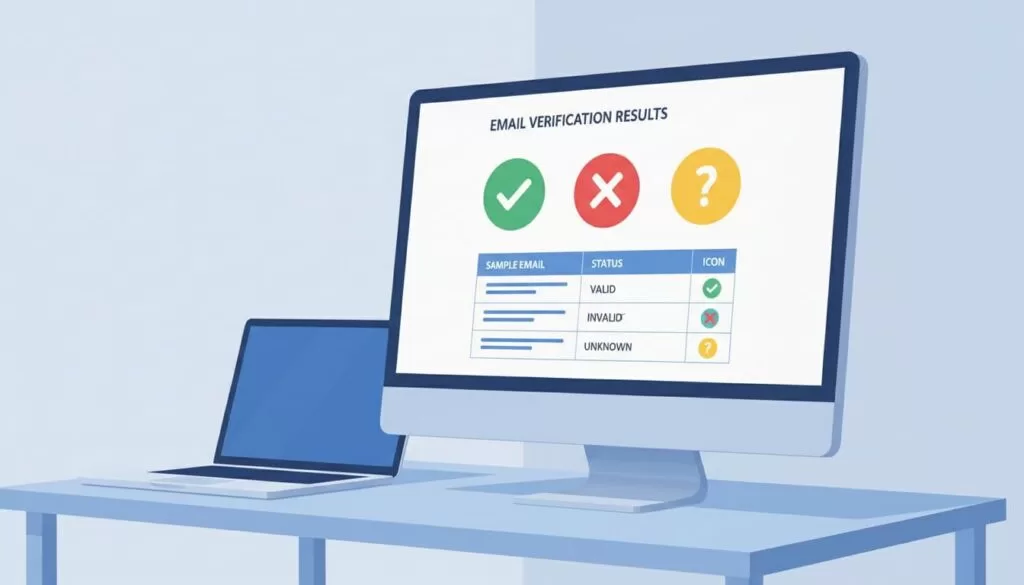
The seven statuses and what each one means
| Status | Meaning | Default action |
|---|---|---|
| Valid | The address exists and can receive mail | Send |
| Invalid | The address does not exist or cannot be delivered | Suppress |
| Accept-all | The domain accepts any address, so the mailbox is unproven | Review |
| Webmail | A consumer provider such as Gmail or Yahoo | Review |
| Disposable | A temporary address from a throwaway service | Suppress |
| Gibberish | The address looks randomly generated | Suppress |
| Unknown | The check could not finish | Re-check later |
Status names come from the Hunter verifier page. Hunter can rename or add statuses, so compare your export against the current documentation before you build automation on exact labels.
Prepare your CSV file before you upload
Clean input produces clean output. Spend ten minutes on the file before you spend credits. Every duplicate row costs money and adds noise to your results.

Use one header row and one address per row. Keep extra columns, because you need them later for segmentation and CRM imports.
| Column header | Purpose |
|---|---|
| The address to verify | |
| first_name | Personalization and merge fields |
| last_name | Duplicate detection and CRM matching |
| company | Segmentation and routing |
| domain | Quick filtering of accept-all domains |
| source | Audit trail for where the lead came from |
| notes | Context for the sales rep |
Normalize and deduplicate
- Trim leading and trailing spaces from every cell.
- Convert every address to lowercase.
- Fix obvious typos such as gmal.com or hotmial.com.
- Remove exact duplicates and keep the row with the most complete data.
- Remove rows with no domain or with a syntax error.
- Save the original file untouched and work on a copy.
The copy rule matters. You always want a way to retrace your steps if a column gets overwritten or a filter removes the wrong rows.
Run the Hunter bulk email verifier
Hunter offers a Bulk Email Verifier next to the single-address tool. The flow follows the same pattern in most tools: upload, map columns, verify, export. Menu labels can change, so follow the on-screen prompts and check the current Hunter help center if a step looks different.
- Open the bulk verification area in your Hunter account.
- Upload the cleaned CSV file.
- Map the email column when Hunter asks.
- Start the job and let the job finish before you change anything.
- Download the results file and save the file under a new name, such as list-verified-2026-10.csv.
- Add a verified_date column so nobody treats an old check as current.
Keep the results file separate from your master list. Merge results back by email address, never by row number. Row numbers shift when you sort or filter.
Hunter.io verification credits and plan limits
Verification uses credits, so budget before you upload a large file. The Hunter pricing page states a verification costs 0.5 credit when you use the Email Verifier or the Bulk Email Verifier. The page also says no verification credit is counted when a verification fails or the address is disposable.
At 0.5 credit per address, 1,000 addresses use about 500 credits. A list of 10,000 addresses uses about 5,000 credits. Check the numbers against your plan before you start.
| Plan | Monthly credits | Credit use for verification |
|---|---|---|
| Free | 50 | 0.5 credit per address |
| Starter | 2,000 | 0.5 credit per address |
| Growth | 10,000 | 0.5 credit per address |
| Scale | 25,000 | 0.5 credit per address |
| Enterprise | Custom | Confirm with Hunter |
Credit allowances come from the pricing page at the time of writing. Prices and allowances change often, so confirm the current figures on the official pricing page before you buy. Annual billing also changes the monthly rate, so compare both options there.
How to save credits
- Remove duplicates before upload.
- Drop addresses with syntax errors before upload.
- Skip addresses you verified in the last 30 days.
- Verify in batches by campaign rather than the whole database at once.
- Verify at capture with the API, so bad addresses never enter the list.
Segment results into send-safe, review, and suppress
The export is where the real work starts. Filtering for valid and stopping there wastes useful data. Split the file into three groups instead, and match each group to a different level of risk.
| Result | Segment | Next step |
|---|---|---|
| Valid | Send-safe | Send at normal cadence and track bounces |
| Invalid | Suppress | Never mail and remove from active sequences |
| Gibberish | Suppress | Exclude and check the lead source |
| Disposable | Suppress | Exclude because intent is low and risk is high |
| Accept-all | Review | Send only high-value contacts and start slowly |
| Unknown | Review | Re-verify after a few days |
| Role-based such as info@ or sales@ | Review | Use only when team outreach fits |
| Webmail | Review | Keep when expected, such as for consultants |
Send-safe group
Valid addresses go into your main sequence. Send at your normal volume and watch the first batch. A healthy list should show very few hard bounces. If bounces rise, pause and inspect the source of the leads.
Review group
Review does not mean delete. Accept-all addresses are unproven. Pull them into a small test batch, send a low volume, and measure bounces and replies. Expand only when results stay clean.
Role-based addresses need a decision about who you want to reach. A sales@ address can work when you sell to a team. A decision-maker target usually needs a named mailbox. Use the Hunter email finder or domain search to look for a personal address at the same company.
Suppress group
Move invalid, gibberish, and disposable addresses to a suppression list. Do not just delete the rows. A suppression list stops the same address from re-entering your system through a new import.
Handle accept-all addresses with a test batch
Accept-all domains cause most uncertainty in B2B lists. The server accepts every address during the check, so the check cannot tell a real mailbox from a made-up one. Hunter lists accept-all as a status and describes methods to verify some of these addresses. Results still vary by domain.
Use a staged approach.
- Group accept-all contacts by domain.
- Rank the contacts by value, such as job title or company size.
- Send to the top 10 percent first.
- Wait two to three days and check the bounce report.
- Send the next group only when bounces stay low.
Set your own bounce threshold before you start. Many senders pause at a low single-digit bounce rate, but the right limit depends on your mailbox provider and your history. Check the sender guidelines from Google and Yahoo for current requirements.
Schedule re-verification
Addresses decay. People change jobs, companies close domains, and mailboxes shut down. Hunter’s guide notes valid addresses decay over time, so a single cleanup does not last.
| List type | Suggested re-check timing |
|---|---|
| Active outreach list | Before each new campaign |
| Warm leads in a CRM | Every quarter |
| Purchased or scraped lists | Before first use and again after 30 days |
| Old inactive contacts | Before any re-engagement campaign |
The timing above is a working rule, not an official Hunter figure. Adjust the timing based on your own bounce data.
Verify at capture with the API and forms
Cleaning the same mess every quarter costs credits and time. Prevention works better. Hunter publishes a guide on real-time email verification in forms, which shows how to check an address as a visitor submits the form.
- Block invalid and disposable addresses at the form.
- Warn visitors who type a likely typo.
- Tag accept-all submissions for review.
- Log the verification date in your CRM.
Verification credits count the same way across the web app, the API, the browser extension, and the Google Sheets add-on, according to the Hunter pricing page. Plan your credit budget across all of these channels.
Measure whether verification worked
A workflow needs a scoreboard. Record these numbers before and after each cleanup.
| Metric | Where to find the metric | What to watch |
|---|---|---|
| Hard bounce rate | Your email platform report | A drop after cleanup |
| Reply rate | Your email platform report | A rise as dead addresses leave |
| Spam complaints | Postmaster tools | Stay low and stable |
| Credits used per list | Hunter account | Cost per clean address |
| Share of list suppressed | Your results file | Track by lead source |
Compare lead sources too. If one source produces a large share of invalid addresses, stop buying from the source or ask for a refund. The source column in your CSV makes this analysis easy.
Hunter.io compared with other verifiers
Hunter fits teams who want finding and verifying in one account. Dedicated verification tools may suit very large, verification-only jobs. Hunter publishes a roundup of the best email verifiers, and the roundup is a useful starting point. Remember Hunter wrote the roundup, so cross-check with independent reviews and run a small sample through two tools before you commit.
A simple sample test
- Pull 500 addresses from one list.
- Verify the same 500 addresses in two tools.
- Compare the statuses for each address.
- Send a small batch to the disputed addresses.
- Pick the tool with fewer surprise bounces.
Common mistakes to avoid
- Uploading a file with duplicates and paying twice for the same mailbox.
- Sending to accept-all addresses at full volume.
- Deleting invalid rows instead of suppressing them.
- Treating a verification from last year as current.
- Skipping warm-up on a new sending domain.
- Ignoring bounce reports after a clean verification.
Verification reduces bounces but does not replace good sending practice. Authenticate your domain with SPF, DKIM, and DMARC, keep volume steady, and write relevant messages.
Frequently asked questions
Is Hunter.io email verification free?
Hunter has a free plan with a small monthly credit allowance. Verification costs 0.5 credit per address according to the pricing page. Confirm the current allowance on the official page.
How accurate is Hunter email verification?
Hunter does not publish a guarantee, and no verifier can offer one. Treat results as risk ratings. Test accept-all and unknown addresses in small batches.
What should you do with accept-all emails?
Review them. Send a small test batch to high-value contacts, watch bounces, and expand only when results stay clean.
Does a failed verification cost credits?
The pricing page states no verification credit is counted when a verification fails or the address is disposable. Confirm the current rule before you run a large file.
How often should you re-verify a list?
Re-check before each campaign and at least quarterly for active lists. Addresses decay as people change roles.
Can you verify emails without uploading a CSV?
Yes. The single Email Verifier checks one address at a time. The API, the browser extension, and the Google Sheets add-on also verify addresses.
Conclusion
Hunter.io email verification reduces risk before you send. Prepare a clean CSV, run the bulk verifier, and read each status as a risk rating. Send to valid addresses, test the review group in small batches, and suppress the rest.
Then build the habit. Verify at capture, re-check before each campaign, and track bounce rate against each lead source. Check the official Hunter pricing page for current credit costs before your next large upload.
