The first time I set up Wise ACH payments, I expected a maze. Instead, I found a few account details, shared them with the sender, and watched the transfer land like any normal bank deposit.
The part that matters most is this, ACH receiving in Wise works best when I treat it like a real bank setup. I need the right USD details, the sender needs the right instructions, and I need to know what Wise shows in my account before I call the payment done.
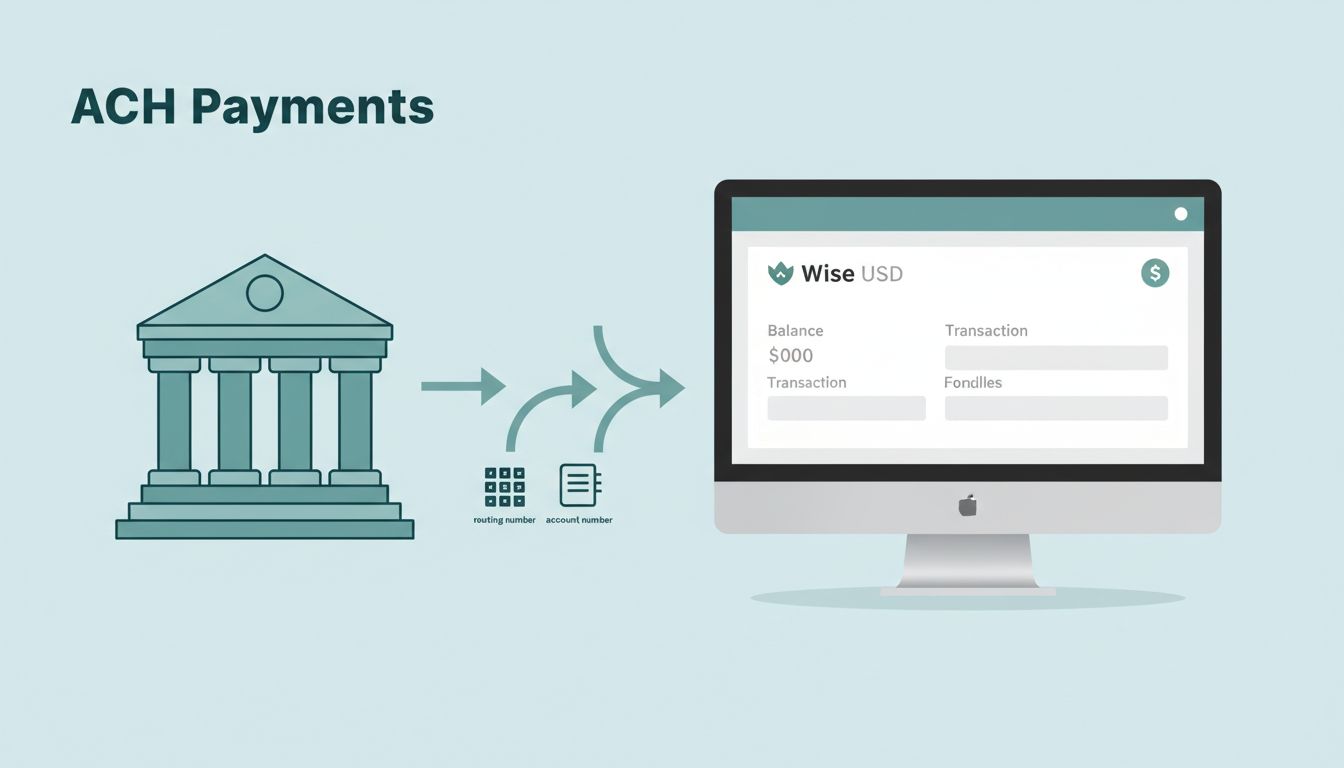
Where I find my Wise ACH details
I start in the Wise app or on the website, then I open my USD balance. If Wise offers ACH details for my account, I can see the routing number, account number, and bank name there.
That small step matters because Wise can show different details depending on the currency and the account type. I also make sure my account is verified, because Wise may ask for identity checks before it shows full account details. The most useful reference I’ve found is Wise’s own help article on how account details work.
Here’s the simple path I follow:
- I open my USD balance.
- I tap or click account details.
- I copy the routing number, account number, and bank name.
- I check that my account name matches my Wise profile.


I keep those details in one note, then I verify them again before I send them out. That extra minute saves me from a messy payment later.
What I send to the payer
When someone wants to pay me by ACH, I send only the bank details they need. I don’t send my Wise login, password, or verification codes. ACH needs banking information, not account access.
I treat my Wise details like bank details, because that’s what they are.
A clean ACH request usually includes the basics below.
| Detail | Why I share it |
|---|---|
| Account name | It should match my Wise profile |
| Routing number | It sends the payment through US ACH |
| Account number | It points the money to my USD balance |
| Bank name | Some payroll tools ask for it |
| Reference note | It helps me match the deposit |
If the payer asks how ACH works from their side, I point them to Wise’s send money with ACH page. That helps if they need a local US transfer from their bank.
I also tell them one important thing, this is ACH, not a wire. The details can look similar, but the process and timing are different. If a company wants to pull money from my account, I ask for an ACH authorization form first. That protects both sides and keeps the payment trail clear.
For a broader view of what I pay when money moves through Wise, I also keep an eye on Wise Business fees for receiving ACH payments. It helps me compare the cost before I hand over my details.
How I confirm the payment landed
Once the sender says the transfer is on its way, I don’t count it as received yet. I open Wise and check the incoming activity for my USD balance. Then I match the amount, the sender name, and the date.
If the payment shows as pending, I give it time. ACH can be quick, but it can also take a few working days. Wise says transfer timing depends on the route and account setup, so I don’t panic if I don’t see the money instantly.
I also watch for app alerts and email updates. If the amount looks wrong, I contact the sender right away. A small typo in the routing number or account number can send the payment in the wrong direction, or send it back.
When I confirm a payment, I look for three things:
- The amount matches what I expected.
- The sender name looks familiar.
- Wise marks the transfer as complete, not pending.

That’s the moment I relax. Before that, I stay a little cautious, because money can be delayed even when the sender did everything right.
Fees, limits, and verification that can change the experience
ACH feels simple, but Wise still applies rules that can change by country, account type, and policy updates. I don’t assume every Wise account gets the same receiving setup.
Wise’s receiving money pricing page is helpful here. It shows how Wise handles receiving and adding money, and it reminds me that the sender’s bank can still charge a fee on their side. In many cases, Wise says receiving money into a Wise account is free, but I still check the current page before I rely on that.
Verification can also slow things down. Wise may ask for ID, address proof, or business checks before it unlocks full details. That’s normal, and it’s one reason I set up my account well before I need a payment.
If I’m comparing payment tools, I also read Wise vs Payoneer for low-cost transfers. That comparison helps when I need a different payout flow, not just a bank deposit.
For me, the rule is simple, I check the details, I confirm the setup, and I don’t assume every Wise ACH flow works the same way. That keeps surprises small and cash flow easier to track.
The part I never skip
When I receive ACH payments in Wise, the process stays smooth because I slow down at the start. I find the right USD details, share only what the payer needs, and wait for Wise to mark the transfer complete.
That’s the whole trick. Correct details beat fast guesses every time, and that matters even more when money is moving between business tools and bank systems.